Affiliate links may be used in this post. I may receive a small commission at no extra cost to you if you make a purchase through my affiliate link
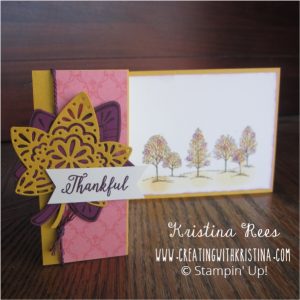
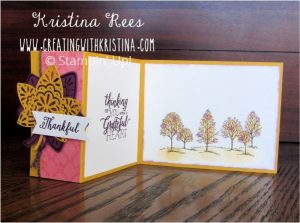
In today’s card tutorial I am going to teach you how to make this Z fold fall thank you card. I am using the eraser from the back of a pencil to create leaves.
Here is a list of supplies with links to my shop that I used to make this card
Product List


You will also need a new pencil with an eraser on the end.
Fall Thank You Card Measurements
Crushed Curry card stock 8 1/2″ x 4 1/4 scored at 2″ and 5 1/2″ and 3 1/2″ square
Blackberry Bliss 3 1/2″ square
Very Vanilla 4″ x 5 1/4″ and 3 1/4″ x 4″ and 3/4″ x 2 1/4″
Tea Room designer series paper 3 3/8″ x 4 1/4″ and 1 1/2″ x 4 1/4″
Fall Thank You Card Instructions
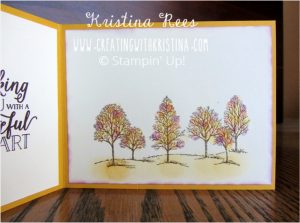
- Stamp trees in Soft Suede on Very Vanilla
- Use pencil eraser and stamp random “leaves” in Crushed Curry, Calypso Coral and Blackberry Bliss
- Use sponge dauber to color grass with Crushed Curry
- Add ink to the edge of cardstock with sponge dauber in Blackberry Bliss
- Glue to right side of card base
- Stamp large leaf in Blackberry Bliss on Blackberry Bliss cardstock and cut out
- Cut out detailed leaf from Crushed Curry cardstock
- Glue Tea Room DSP to top and front flap of card base.
- Tie Blackberry Bliss Twine to 2″ flap of card base
- Add adhesive to back of detailed cut leaf on Silicone mat, turn over and rub off excess adhesive and stick to Blackberry leaf
- Use Dimensionals to adhere leaves to flap
- Stamp Thankful to small strip of Very Vanilla and snip flag tails on both ends
- Stick to top of leaves with Dimensionals
- Stamp “thinking of you” to smaller Very Vanilla cardstock and adhere to inside of card base
Thank you for stopping by. If you would like to see another card I made using Falling for Leaves stamp set, check out Falling for Leaves Thank You Card.


 Not sure what to write? Sign up for my email list and get 43 verse ideas to write inside your next handmade card.
Leave a Reply