Affiliate links may be used in this post. I may receive a small commission at no extra cost to you if you make a purchase through my affiliate link
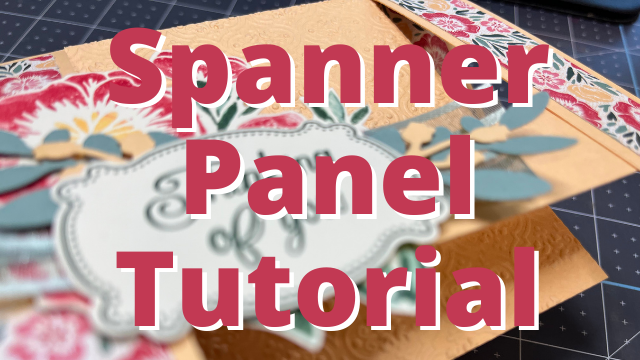
On today’s Fun Fold Friday I made a Spanner Panel card using the Lovely & Lasting products from Stampin’ Up!
Measurements and Instructions are written below the video.
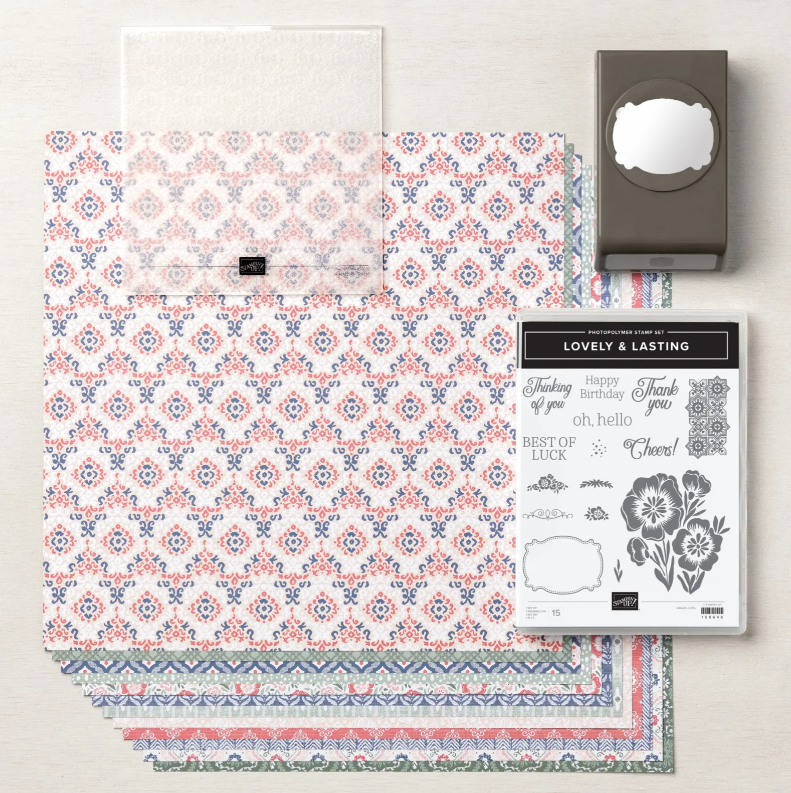
Give your papercrafting projects a beautifully antiqued feel with the Lovely & Lasting Stamp Set! With gorgeous florals, border, and tile designs, this stamp set will dress up any card to make it feel timeless. Repeat the tile image to create a textured background or make your own pattern by repeatedly stamping the flower and leaf stamps! Then use one of the elegant everyday sentiments to finish your project and put a smile on someone’s face
Measurements
- Card base 8-1/2″ x 5-1/2″
- Embossed cardstock 4-1/4″ x 3-1/2″
- Spanner cardstock 1″ x 5-1/2″
- DSP (Designer Series Paper) cut 4 @ 3/4″ x 4″
- Inside 4″ x 5-1/4″
- Scraps for stamped image and label punch
Instructions
- Cut cardstock and Designer Paper according to measurements listed above
- Run cardstock through embossing folder
- Cut 1″ slits up to the fold line on both sides of the landscape card front
- Glue the embossed cardstock to the center and DSP to the 2 side flaps
- Attach the spanner panel on the back side of the 2 1″ flaps and above the center flap
- Stamp, color and cut out images and label.
- Assemble and adhere the image and label to the corner or center of the spanner panel avoiding the center flap.
- Finish by adhering the last 2 DSP pieces to right and left side of the inside piece.
")

 Designer Series Paper")


 Open Weave Ribbon")


Host Code Special
Spend $50 – $149 and use this month’s host code and I will send you a special thank you gift at the end of the month.


 Not sure what to write? Sign up for my email list and get 43 verse ideas to write inside your next handmade card.
Leave a Reply