• Skip to secondary menu
  • Skip to main content
  • Skip to primary sidebar

Kristina Rees, CreatingWithKristina.com

Independent Stampin' Up! Demonstrator

  • Home
  • Benefits of Joining
  • Shop With Me!
    • Shop Stampin’ Up!
    • Shop Tutorials
    • Must Have Tools
    • My Account
  • About Me
  • Contact Me
  • Events
  •  

Use a Stunning Vellum Overlay to Enhance Stamped Designs

March 28, 2018 4 Comments

Affiliate links may be used in this post. I may receive a small commission at no extra cost to you if you make a purchase through my affiliate link

Trend Alert! Spring Crafting with a chic vellum overlay. In this blog I will show you how to master overlays to create flower cards with a stunning level of details and depth.

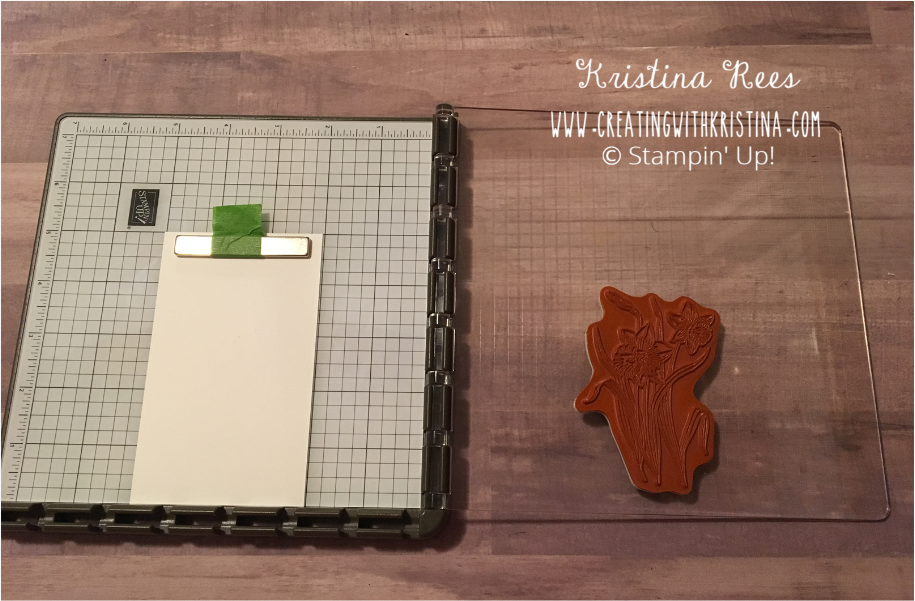
I’m using the new Stampin’ Up! Stamparatus stamping tool that will be available to customers June 1, 2018. This tool is perfect for getting stamped images placed so they line up exactly when you assemble the card.
Youre Inspiring Vellum Overlay 3

Vellum Overlay Card Detail

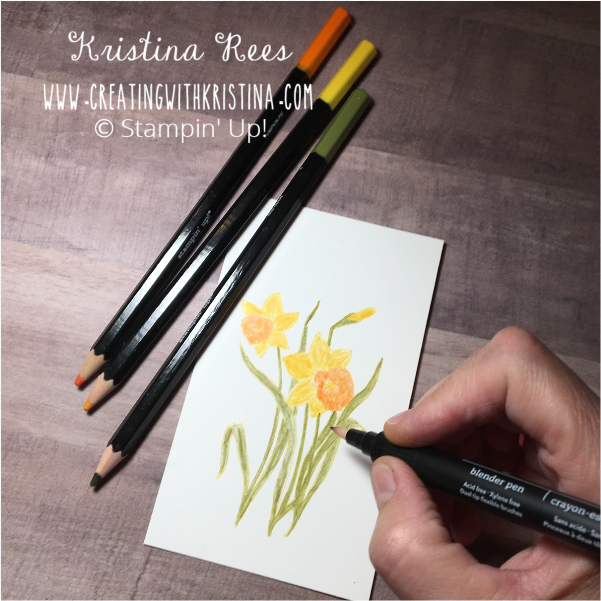
To create this beautiful card I first stamped my floral design (I’m using the daffodils from the Occasions Catalog, You’re Inspiring stamp set) in a very light colored ink. I did mine in Daffodil Delight. Then I colored my flowers with the watercolor pencils and blended with the blender pen.
Youre Inspiring Vellum Overlay 4
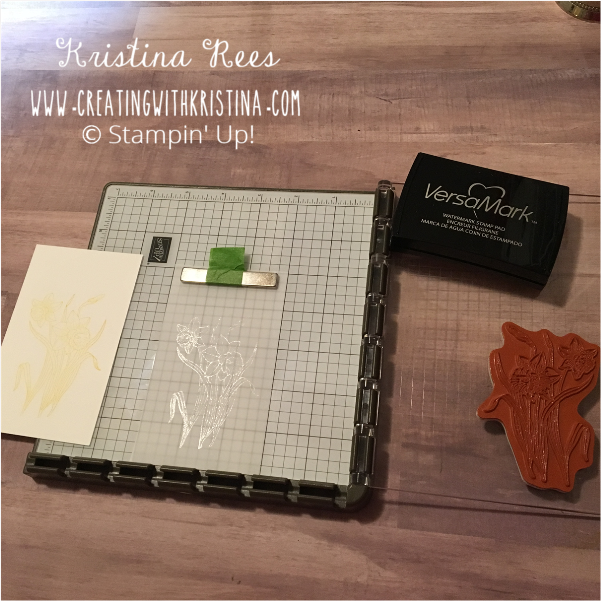
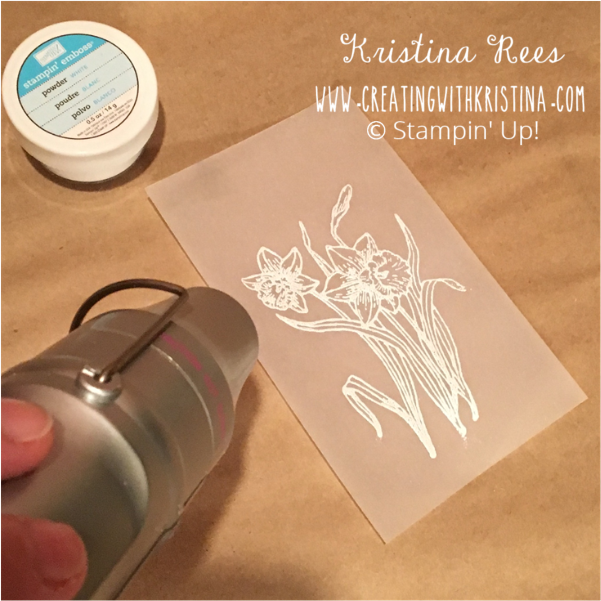
After coloring I took a piece of vellum cut the same size as my white cardstock. To create the vellum overlay I white embossed the daffodil image in the same placement as the colored image so they will lineup with each other. This is where the new Stamparatus will be invaluable to this stamping technique.
Youre Inspiring Vellum Overlay 2

Youre Inspiring Vellum Overlay 1

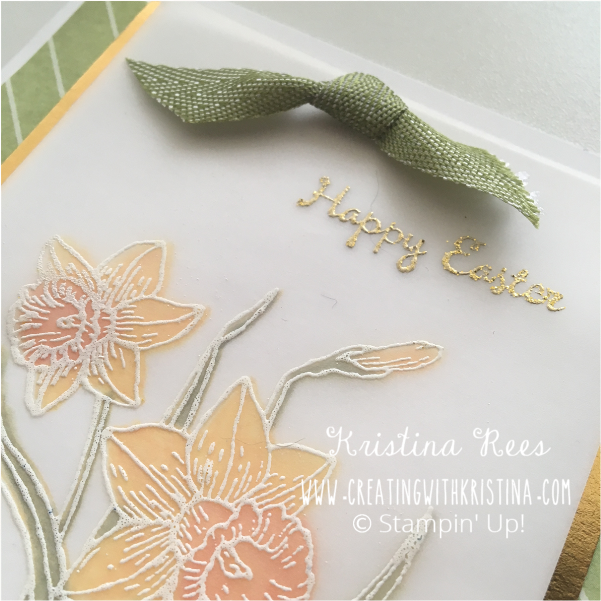
After heat embossing the daffodil image I went back and did the Happy Easter in gold embossing powder. I used a glue dot to stick the vellum on to the white cardstock. To cover it up I stuck a bow over it with another glue dot.
Youre Inspiring Vellum Overlay closeup
To complete the card I layered the daffodil on gold foil and green striped paper from the Delightful Daisy series.
Finally I used a white card base to put the layers on.

Hints for the Perfect Vellum Overlay

  • Use a stamping tool, like the Stamparatus
  • The anti-static embossing buddy is your freind
  • Be careful not to hold heat next to vellum for too long, it will warp

LINKY PARTIES:

Wow us Wednesday

I hope you enjoyed today’s tutorial. All supplies are listed below and don’t forget FREE stamps with Sale-a-bration ends March 31, 2018

Signature for Blog


Product List

You’Re Inspiring Clear-Mount Stamp Set

You’Re Inspiring Clear-Mount Stamp Set
[145808]
$19.00

Whisper White 8-1/2" X 11" Thick Cardstock

Whisper White 8-1/2″ X 11″ Thick Cardstock
[140272]
$7.00

Whisper White 8-1/2" X 11" Card Stock

Whisper White 8-1/2″ X 11″ Card Stock
[100730]
$9.00

Delightful Daisy Designer Series Paper

Delightful Daisy Designer Series Paper
[144137]
$11.00

Gold Foil Sheets

Gold Foil Sheets
[132622]
$4.00

Old Olive 3/8" Mini Chevron Ribbon

Old Olive 3/8″ Mini Chevron Ribbon
[144196]
$7.00

White Stampin' Emboss Powder

White Stampin’ Emboss Powder
[109132]
$5.00

Gold Stampin' Emboss Powder

Gold Stampin’ Emboss Powder
[109129]
$5.00

Vellum 8-1/2" X 11" Card Stock

Vellum 8-1/2″ X 11″ Card Stock
[101856]
$8.00

Heat Tool

Heat Tool
[129053]
$30.00

Versamark Pad

Versamark Pad
[102283]
$8.50

Watercolor Pencils

Watercolor Pencils
[141709]
$16.00

Blender Pens

Blender Pens
[102845]
$12.00

FREE stamp set

Filed Under: Tips & Tutorials Tagged With: You're Inspiring

Subscribe

Not sure what to write?

Sign up for my email list and get 43 verse ideas to write inside my next handmade card.

I love creating beautiful handmade cards and want to share that love with you. I believe expressing our creativity with handmade cards can make a difference in this world by making it a happier place. I created this blog to help you make a difference with your creativity too.

I discovered cardmaking just a few years ago. It all started when a friend of mine invited me over to make cards on a Friday night. There were 3 other ladies there. We had a great time creating beautiful cards together all evening. I was hooked! I started dreaming of my own home filled with friends making these beautiful cards. And so I started my business Creating with Kristina.

I am a retired middle school math teacher. I am married and have 3 step-daughters and 8 grandchildren that call me Nana. I love cats and have 2. Their names are Diamond and Merlin. You will periodically see them in my videos and pictures and I love sharing them on Instagram. Contact Me

Reader Interactions

Comments

  1. Shirley @Housepitality Designs says

    April 3, 2018 at 10:42 pm

    What a most beautiful card…and yes the vellum just added the perfect touch!

    Reply
    • Kristina Rees says

      April 10, 2018 at 9:10 pm

      Thank you Shirley.

      Reply
  2. Shirley @Housepitality Designs says

    April 3, 2018 at 10:42 pm

    What a most beautiful card…and yes the vellum just added the perfect touch!

    Reply
    • Kristina Rees says

      April 10, 2018 at 9:10 pm

      Thank you Shirley.

      Reply

Leave a Reply Cancel reply

Your email address will not be published. Required fields are marked *

Primary Sidebar

Welcome!

Kristina Rees, Stampin' Up! Demonstrator


Kristina Rees


Stampin' Up!
Demonstrator

Helping you create beautiful cards, scrapbook pages, and handmade gifts that connect people you love.


Let's Connect!

  • Email
  • Facebook
  • Instagram
  • Pinterest
  • YouTube
Subscribe
Kristina Rees, Shop My Online Store

CLICK here to see the May 2026 Catalog

Stampin' Up! Catalog

Search

Archives

Kristina Rees, Disclaimer

The content of this site is the sole responsibility and opinions of Kristina Rees as an Independent Stampin' Up! Demonstrator and the use of its content, classes, services, and/or products offered is not endorsed by Stampin' Up! Stamped images are copyright Stampin' Up!

View My Privacy Policy
Content © Kristina Rees, all rights reserved. Wordpress Genesis Framework customized by WebsByAmy, LLC